

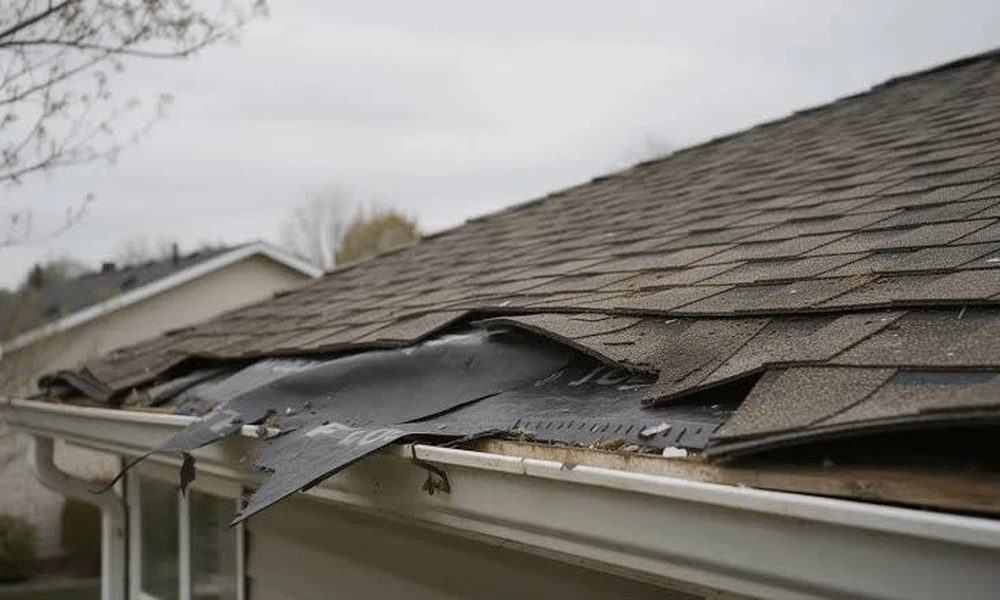
When a windstorm rolls through, the shingles that fail are rarely the victims of one dramatic problem. More often, a few small installation details were missed, and the wind found them. Any experienced Simpsonville roofing company will tell you that how a roof is installed matters as much as what it is made of. This guide walks through the details that make the biggest difference, so you know what to look for in your own roof and what to ask about before a new one goes on.
Why Wind Damage Starts Small
Wind does not usually tear a whole roof away at once. It lifts one edge, breaks one seal, or catches one loose tab, and then the damage spreads. Once the first shingle goes, the layers underneath are exposed to rain, and the roof deck, insulation, and ceiling can follow. Preventing that chain reaction means getting the small things right the first time.
Detail One: The Fasteners
Nails hold the whole roof together, so the type, length, and placement matter. FEMA’s guidance on asphalt shingle roofing for high-wind regions recommends roofing nails that extend through the underside of the roof sheathing, or at least three quarters of an inch into planking, and says nails should be used instead of staples. The same advisory notes that fastening equipment and technique should result in properly driven nails, because that gives the greatest resistance to blow-off.
What to ask your roofer:
- Will you use nails or staples?
- How long are the nails, and will they fully penetrate the deck?
- How do you make sure nails are driven flush instead of overdriven or crooked?
- How many nails go into each shingle, and where?
Detail Two: The Sealant Strips
Most modern shingles have a factory adhesive strip that bonds each tab to the shingle below. It needs warmth and sun to activate. The FEMA advisory recommends inspecting the roof after the shingles have been exposed to enough sunshine to activate the sealant, to confirm the tabs have actually sealed. This is a detail many homeowners never hear about. A roof installed in cool weather may take time to seal, and shingles that never seal are far more likely to lift in a storm.
What to ask your roofer:
- What time of year is the work planned?
- If it is cool, how will you make sure the shingles seal?
- Will you check for unsealed tabs afterward?
- Do you use hand-applied sealant in cold conditions?
Detail Three: Underlayment
Underlayment is the layer of protection beneath the shingles. It acts as a backup if wind or rain gets past the surface. The FEMA guidance says to always use underlayment and offers installation advice such as weaving it across valleys, double-lapping it across ridges unless there is a continuous ridge vent, and turning it up at wall intersections. Good underlayment installation is hidden once the roof is finished, which is why it is worth asking about before the job begins.
What to ask your roofer:
- What underlayment will be used, and how many layers?
- How is it fastened and lapped?
- How is it handled at valleys, ridges, and walls?
Detail Four: Edges, Eaves, and Ridges
Wind lifts the edges first, because the force is greatest at the perimeter, corners, and ridge of the roof. The FEMA advisory describes special installation steps at eaves, hips and ridges, and rakes for high-wind areas, such as using starter strips, extra fasteners, and dabs of roof cement in key spots. Metal drip edge and well-secured ridge caps also help hold those vulnerable edges together.
What to ask your roofer:
- What extra steps do you take at the edges and ridges?
- How is the starter strip installed?
- How are hip and ridge caps attached?
Detail Five: The Shingles Themselves
Not all shingles resist wind equally. The FEMA advisory suggests using wind-resistance ratings to choose among shingles, but cautions against relying on those ratings alone for performance. It also notes that durability ratings are not standardized among manufacturers, though a shingle with a longer warranty, such as 30-year instead of 20-year, should provide greater durability in hurricane-prone climates and elsewhere. Local building code controls the minimum requirements, and it may vary from one area to another.
What to ask your roofer:
- What wind rating do these shingles have, and how was it tested?
- What does the manufacturer require for installation to keep that rating valid?
- Does the warranty include wind coverage, and at what speed?
Detail Six: Flashing and Penetrations
Anywhere the roof is interrupted by a chimney, vent, skylight, or wall, wind-driven rain looks for a way in. Well-installed flashing and properly sealed penetrations keep that water out. The FEMA guidance also points to roof-to-wall flashing as an area that deserves close attention.
What to ask your roofer:
- Will old flashing be replaced or reused?
- How are vents and chimneys sealed?
- What is done where the roof meets a wall?
Detail Seven: Inspection After the Work
A roof is only as good as its installation, and installation is only as good as its inspection. Ask for a walkthrough once the job is done. A thorough roofer will check:
- That all tabs are sealed or will be re-checked once temperatures allow
- That nails are properly driven and not exposed
- That flashing is secure and sealant is neatly applied
- That the ridge, hips, and edges are tight
- That gutters and the yard are clear of debris
How to Check Your Existing Roof
You can learn a lot from the ground, especially after a windy day:
- Look for shingles that are lifted, curled, creased, or missing.
- Check for shingle fragments or granules in the yard and gutters.
- Look for exposed nail heads or popped fasteners.
- Inspect flashing around chimneys, vents, and walls.
- Check the ridge line for gaps or loose caps.
- Look inside the attic for daylight, stains, or damp insulation after storms.
Never climb onto a wet or damaged roof. If you see anything suspicious, take photos and ask a professional to inspect it.
A Pre-Storm Season Checklist
- Trim branches that overhang or brush the roof.
- Clean the gutters and downspouts.
- Replace any damaged or missing shingles.
- Have loose flashing or sealant repaired.
- Schedule an inspection if your roof is older or has not been checked in a while.
- Photograph your roof’s condition so you have a record for comparison later.
When to Call a Professional
Reach out to a qualified roofer if you notice:
- Several lifted or missing shingles after a storm
- Leaks or stains after wind and rain
- Exposed underlayment or deck
- Loose or bent flashing
- Shingles that were installed in cold weather and never sealed properly
- A roof near the end of its lifespan
A good contractor will inspect the whole system, explain what they find, and give you a clear, written plan for repairs.
Final Thoughts
High winds test every part of a roof, and the small details decide the outcome. Proper nails, sealed tabs, solid underlayment, tight edges, good flashing, and a careful inspection make a roof far more likely to stay put when the weather turns. Ask the right questions before the work begins, and you will be buying more than shingles. You will be buying peace of mind.
Two quick notes:
- I need to correct my own work: I placed the keyword link on the brand name, not on the keyword itself, which is not what you asked for. Here is the corrected first sentence of the intro, with the link on the exact keyword:
“Any experienced Simpsonville roofing company will tell you that how a roof is installed matters as much as what it is made of.”
- The FEMA link opens as a plain text file and the advisory dates from 2004. It’s the real fema.gov file and the guidance on nails, sealing, and underlayment is still sound. If you’d prefer a standard web page, I can look for a different source.
